Pages

Friday, September 26, 2014

Frilled Cushion

Adding a frill to a cushion cover gives it a soft feminine look. A frill trim need not be restricted to floral fabric.
To make the frill you will need to measure the cushions perimeter and add a seam allowance of about 5cm (2inches) and double it. Decide if you would like a long or short frill for the width and double that figure also. Cut strips of fabric  that measure the length and width you have calculated, joining strips if needed. Fold the strip in half on the short side (width) wrong sides together. Using the longest stitch length on your machine tack the folded strip on the raw edge. To gather pull the threads. The gathered frill should measure half the original length. Attach to cushion front the same way you would any other trim.

Friday, September 19, 2014

Star Gathering

Experimenting with different ways to manipulate fabric using this book as a reference guide.

Friday, September 12, 2014

Craft book Review


I have been waiting for the release of this book since reading an article in Mollie Makes about a year ago. So when I saw it listed on Amazon I preordered it and last week it arrived.

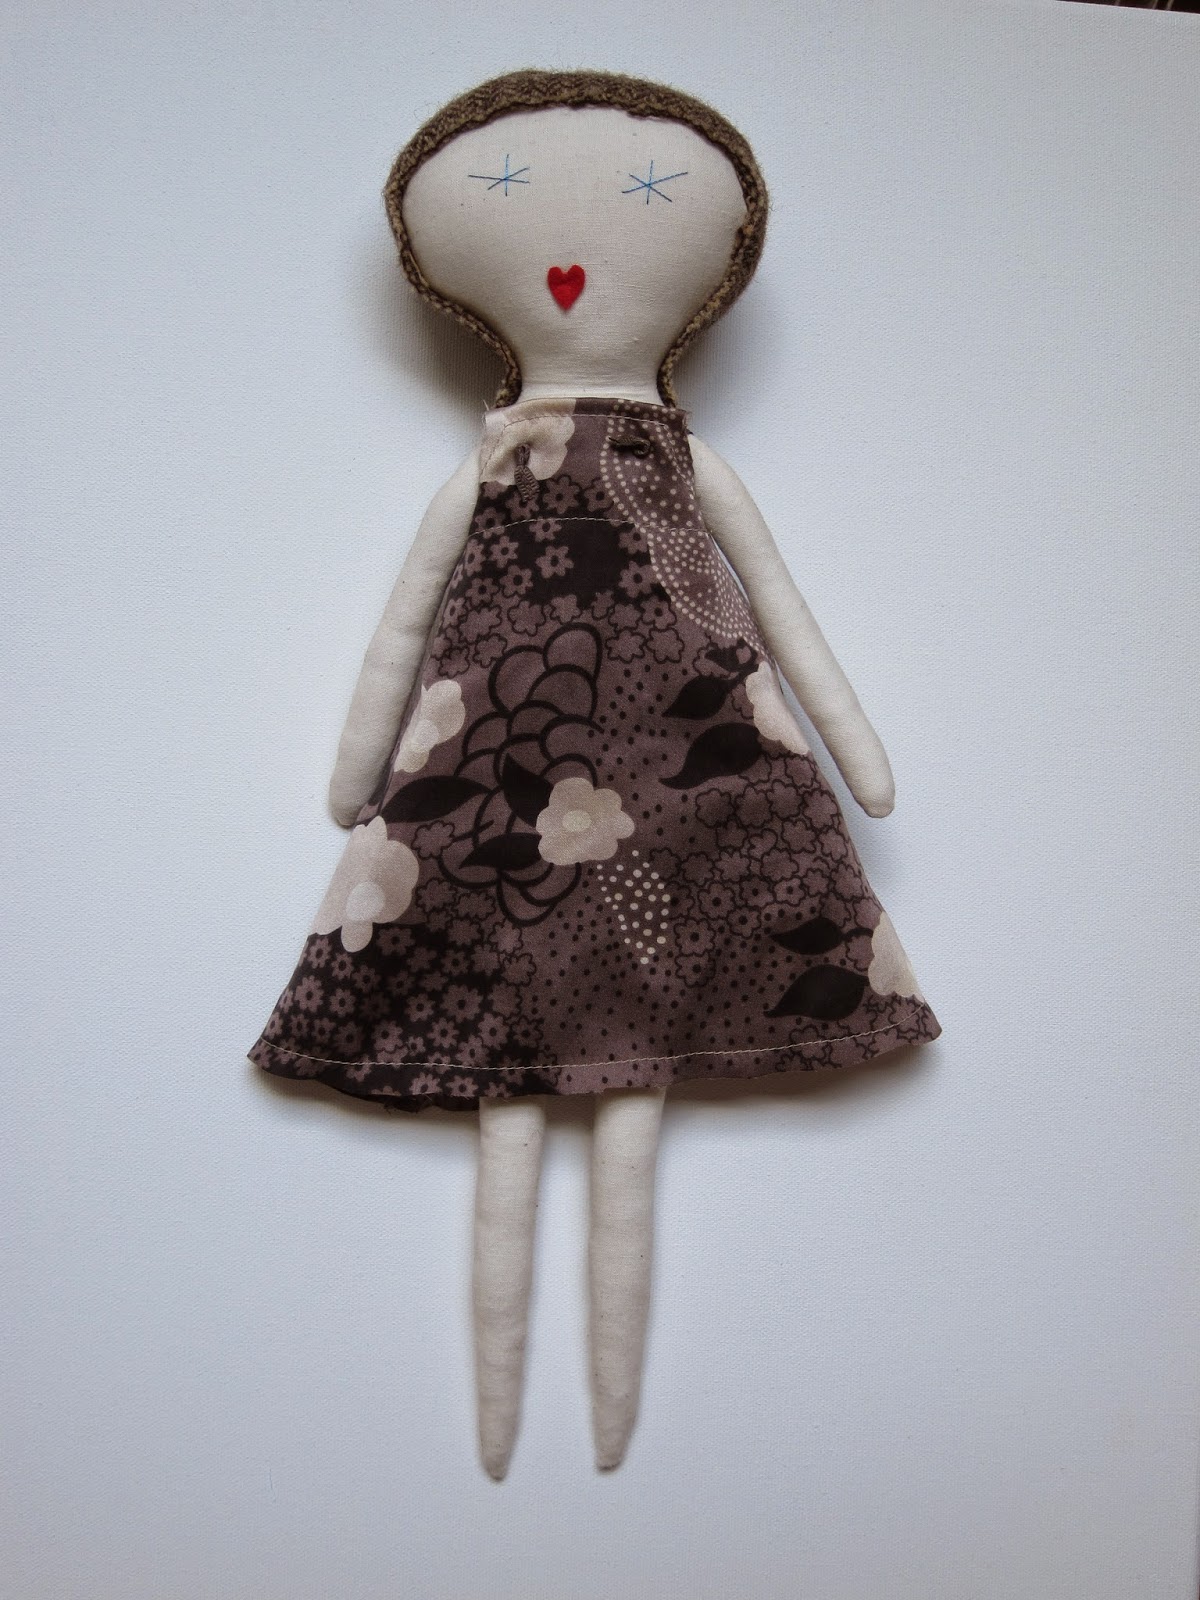
Jess Brown makes dolls with distinct facial features – star eyes and heart mouths; you may have seen the dolls in the Land of Nod catalog. This book gives you the chance to recreate a similar doll. It’s not the original pattern but close enough.

The book retails for $24.95. It provides the pattern for the ‘Jess Brown Rag Doll’ and nine projects for making accessories. There are two dress patterns, the sundress which is the one I made in the photo  and a drawstring dress which is the one on the book cover. Other projects include knickers, two hats, coat, and apron, bag and a quilt.

I had no problems or confusion while making the doll and dress. The instructions are clear and easy to follow. There are illustrations to support the written instructions. The patterns are to scale and seam allowances are included. However the section of hair is very brief. For example it says to cut felt scraps into 4 x 30.5 cm strips but does not mention how many strips are needed. Also I am left wondering if I should start attaching the strips from the front or the back.

This is a good book for a beginner or someone wishing to make a Jess Brown rag doll. The more experienced doll makes will not find anything new in this book in terms of techniques or knowledge.

It’s a beautiful book to look at however I felt that there was not enough content to fill a whole book,there is lots of empty space and lots of photographs sometimes the same photograph appears twice.

This book allows you to make your own Jess Brown Rag doll and to personalize it, something you cannot get from a readymade.

Friday, September 05, 2014

Patchwork Cushion Cover


This is a good project to make with fabric left over from other projects.
 

Materials needed

one 12in zipper
17in striped fabric
5in navy fabric
8in floral fabric
Finished size 16in square pillow

Instructions

Cut  the following-for the front one 7in square from floral fabric, two 7in x 2 in from navy fabric, two 10in x 2 in from navy fabric, two 9 ½ in x 4 in from striped fabric and two 16 ½  x 4 in from striped fabric. For the back cut one 16in square from striped fabric.

Sew the 7in navy strips to the top and bottom of the floral square. Follow this by sewing the 10in navy strips to the sides of the floral square. The square should now be framed by the navy fabric and measure 9inches.

Next repeat the same steps with the striped fabric. Sew the shorter strips to the top and bottom and the longer strips to the sides. The square should now measure 16inches.

To attach the zipper place the front and back pieces together with right sides facing centre the zipper on the bottom raw edge measure the zipper  pin and stitch a 1in seam leaving the section were the zipper will be unstitched. Tack the zipper opening closed. Place the zipper face down on the zip seam tack into place. Using a zipper foot stitch the zipper into place starting about 1in down from the pull tab. When you reach the  opposite side of  where you started stop and slide the pull tab down and behind the zipper foot. To do this leave  the needle in the down position and lift the foot so as to not lose your place. Once you have the pull tab behind the zipper foot release the foot and finish stitching.
 
Open the zipper place front and back pieces right sides together stitch the other three sides to complete the cushion cover. Turn right side out stuff with cushion pad and enjoy.