
Friday, August 22, 2014

Thursday, August 21, 2014
Yoga bag

Thursday, July 24, 2014
Joe the Fisherman

Friday, July 11, 2014
Making and Growing


The garden is growing nicely. The above picture shows yesterdays harvest. That pickle sized cucumber was out of this world delicious.
Abby from Whileshenaps is hosting a sew-along, it inspired me to try the pattern. The pattern is 'The Peanut Baby' by Rachael Gander.
Friday, June 27, 2014
Cushion Covers

Friday, June 20, 2014


Friday, June 13, 2014
Essential Craft Tools
Having the right tool for the job makes a huge difference when working and in the finished product . This week I thought I might show you some of my favourite and essential tools in creating my cushions and dolls.
Rotary cutter, mat and ruler


Rotary cutter, mat and ruler
Three separate items but as a team they are a dream allowing me to cut straight neat edges when making cushions.
Stuffing Stick
Not much to look at and I am sure it has a proper name but it makes turning arms and legs right side out so very easy. Also it was free with a bag of fiber -fill.
Fabric Marker
I like to use the purple end. I write on the fabric and by the time I am finished with the project the marks have completely disappeared. Magic really.
Scissors
Good sharp scissors are important in preventing fatigue when cutting. Only use fabric scissors to cut fabric never cut paper with them, constantly reminding my children not to cut paper with my fabric scissors.
Seam Ripper
For my mistakes of course.
Tape Measure
Measure twice cut once, the advice my TAFE teachers gave me. My tape measure is in centimeters on one side and inches on the other.
Finally my sewing machine, its a Singer, its basic and well I love it.
What tools do you use most often?
Thursday, June 05, 2014
Book Review

The book is divided into two sections with patterns following each section. The first sections focus is on making the doll and hair. The outfits and accessories follow in section two and this makes up most of the book. There is only one doll pattern with seven variations on facial features and hair styles. You need to enlarge the patterns by 140%. I had a go at making the doll but did not enlarge the pattern nor did I add a seam allowance. My finished doll is just under 10inch still a good size doll.
The instructions are straight forward and often brief. There are no step by step pictures to follow. The doll and dress did come together easily enough however I would have liked some illustrations just for confirmation that I was on the right track. The dress I made is on page 68 and the shoes minus the strap on page 30.
The book has no glossary or techniques section and I did have to refer to another craft book for some guidance on a embroidery stitch.
I feel this book assumes the reader has prior knowledge and experience with crafts, knitting and crochet knowledge is also needed for some of the hairstyles. I could not recommend this book to someone who is new to doll making, If you like making clothes for your dolls this is a good book.
I am glad I purchased the book. There are many things within its pages to inspire and challenge me for a while.
Thursday, May 29, 2014
A peek at my work space

Working on new cushion covers for the shop. The fabric is a cotton print by 'Richloom'.
What are you working on?
Check out my new listings at
Friday, May 23, 2014
Simple Bolster Cushion

Bolster cushions are super easy to make. A bolster nestled
by your sofas armrest adds a decorative touch and extra comfort. For more
interest add piping to the seams in step 3.
14” square cushion insert


Materials
20’ fabric
50” ribbon14” square cushion insert
Instruction
1.
Cut one 13 x 19 in rectangle, cut two 3 x 19 in
rectangles
2.
Zigzag 19 in side on all pieces.
3.
Pin and
stitch the narrow rectangles on either side of the wider rectangles. Seam allowance
is ½ in. Remove pins as you stitch. Zig
zag edges. You should now have a 19 in square.
4.
Open and press seams flat. Zig zag all edges.
5.
Fold the square in half right sides together
with the narrow rectangles on the ends. Making sure the seams meet.
6.
Pin and
stitch 1 in in from the edge to form a tube.
7.
Open and iron the seam flat
8.
To make the casing turn the edge over twice ½ in
each time. Iron to keep in place and stitch around the circumference. If your machine has a removable
extension piece remove it while stitching the casing. It makes it so much easier.
9.
To thread the ribbon through the casing channel
pin one end of the ribbon to a safety pin and enter through one gap and slowly
work the pin all around and emerge through the other gap. Repeat on the other end. Turn cover right side out.
10.
To inset the square cushion roll it up and
slowly pull the cover over the cushion. Once the cushion cover is in place pull
the ribbon to gather the sides and tie a bow.
Thursday, May 22, 2014

Saturday, May 17, 2014
Seahorse Cushion


This week I opened an Etsy shop. Something I had been thinking about for a long time. Please stop by and take a look. Just click on the link on the sidebar.
Materials
½ yard linen blend fabric
15 x 24 in printed fabric Zipper
Cushion insert
Fusible web (wonder under)
Seahorse template
Instructions
1 Cut two 12x 16
rectangles from solid fabric, cut two 4
x 24in strips from printed fabric, cut one 7 x 10 in rectangle from printed
fabric for seahorses.
2 Iron the wrong side of the seahorse fabric to the rough
side of the fusible web (or follow product instructions). Trace the seahorse
template onto the paper side of the fusible web 3 times and cut out.3 To position the seahorses on the cushion front, firstly fold the cushion front into thirds along the long side. Place pins at the folds. Unfold the cushion front and place the first and last seahorse on the folds and the centre seahorse will sit between them. There will be about 3 ½ in on the top and bottom edges of the cushion front and the seahorses.

5 Fold the strips in half wrong sides together on the short
side and iron to keep the fold. Open and fold the other way so right sides are
together and stitch the shorts sides. Turn right side out.


8 Align the front and back pieces together right sides
facing. Measure the zipper length a long the bottom long side and stitch the
seam either side of the zipper. Make the seam allowance about ¾ of an inch.
Make sure the pleats are not caught in the seam. It’s a good idea to zigzag the
edges of the sipper seam at this stage.

11 Partly open the zipper. Align the edges of the front and
back pieces right sides together with the pleats sandwiched between the front
and back. Stitch around the edges of the three remaining sides to finish the
cushion
12 Zigzag edges. Turn right side out and insert cushion.
Friday, May 09, 2014
Gathered Cushion Cover

Finished size 31x33cm
Materials
90cm cotton fabricMatching thread
Cushion insert 36x36cm
160cm cord
Instructions
1 For the front cut two 13x37cm strips and one 13x72cm
strip. For the back cut one 30x35 cm piece and one 17x35cm piece.
2 Zigzag down the length of the 72cm strip encasing an
80cm cord. Repeat on the other side.

3 To gather the fabric hold the cord in one hand and push
the fabric towards the centre. When gathered it should be the same length as
the other two pieces.

4 With right sides together stitch the three strips of fabric
to form a rectangle, with the gathered piece in the middle.

5 Unpick the zigzag stitch and remove the cord. The
easiest way is with a seam ripper.

6 On the right side of the fabric top stitch down the
length of the seams. The front piece is now finished.

7 For the back pieces fold one long side ( 35cm)of each
piece under 1cm press and fold under again 1 cm and hem.
8 Place the back pieces on the work surface right side
up. They will overlay by about 5cms. Lay the front piece on top right side
down. Pin the front and back pieces together and stitch around the rectangles perimeter.
Remove pins as you stitch.

Friday, May 02, 2014
Basic Cushion cover with a zip

Finished size: 41 X41cm
Fabric name: Lisette 2012
Materials
Fabric 50cmMatching thread
Zipper 30cm (12in)
Insert 41 X 41 cm
Instructions
1 cut two squares 42 X 42 cm
2 zig zag all edges of both squares to minimize fraying3 place the squares right sides together on your work table lay the zipper on one edge and mark where it starts and ends. Pin and stitch the seam using a 1 cm seam allowance. Leave the zip opening unstitched.

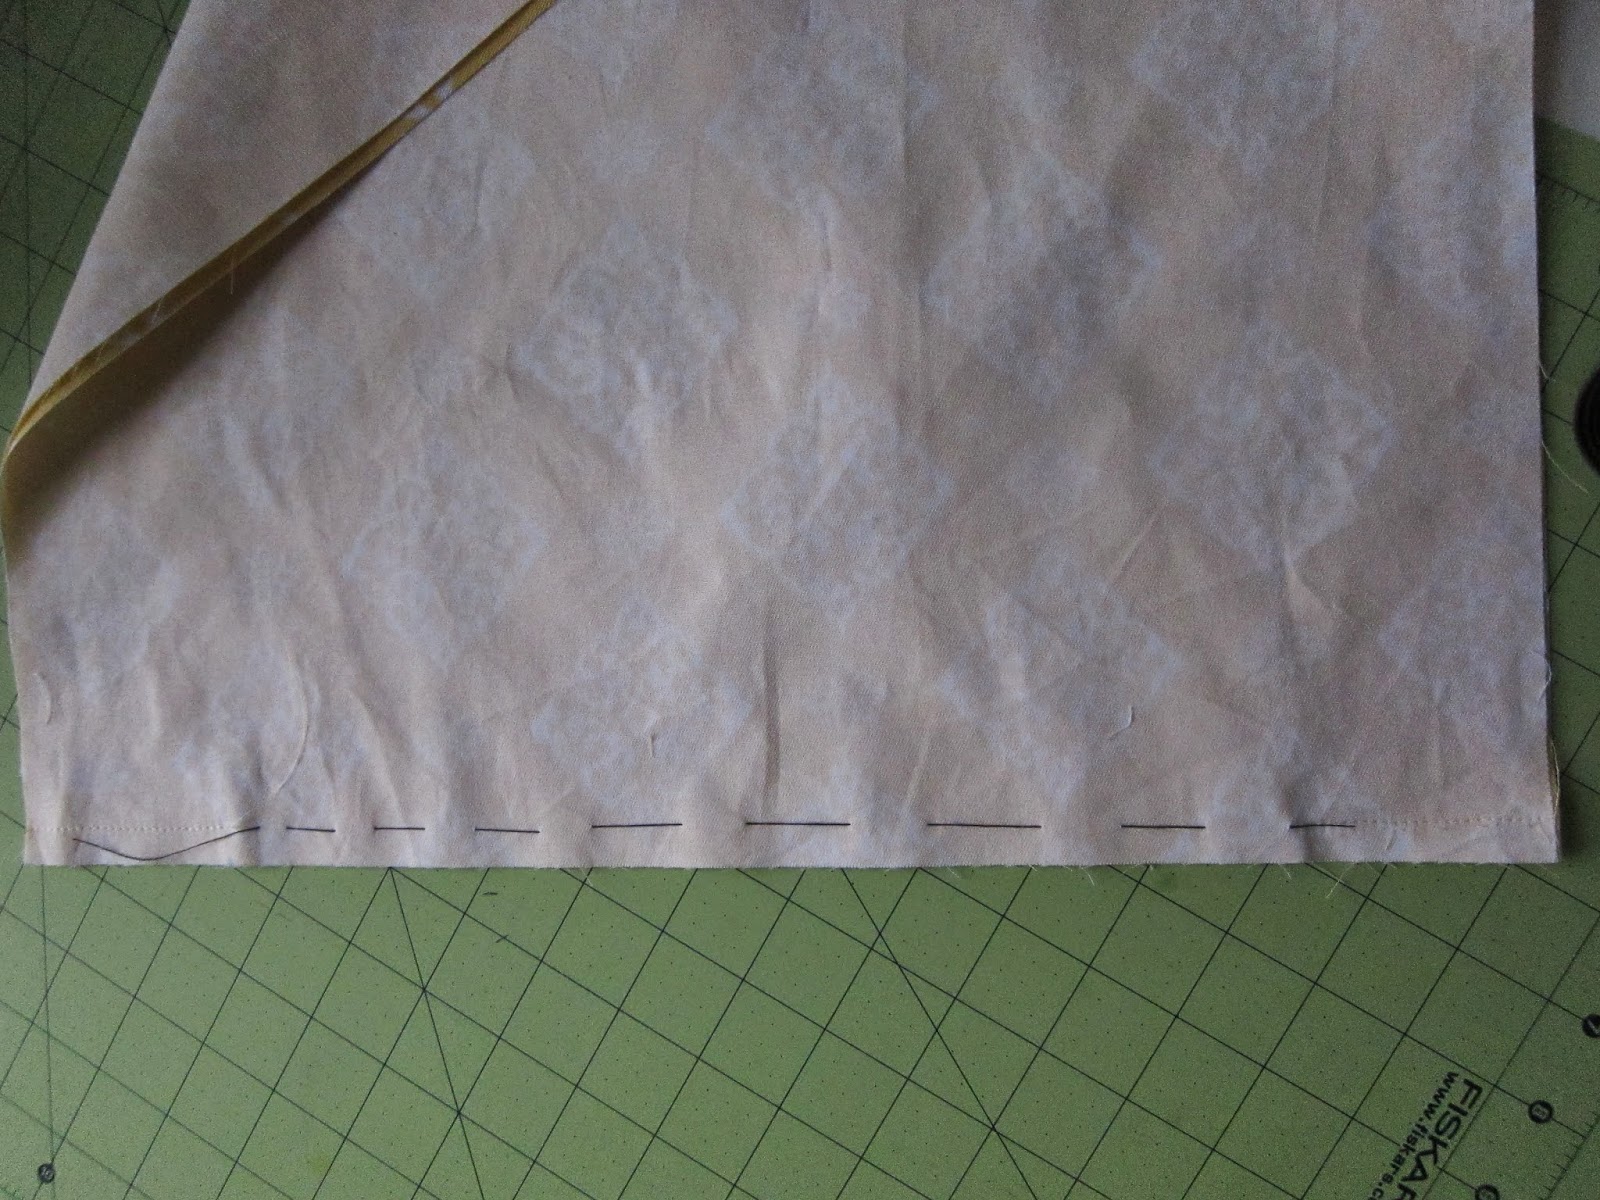
4 place the zip within the tacked section of the opened seam
right side down. Position the zip slightly off centre so the zip teeth sit on
one seam allowance only. Pin in place and tack.

5 using the zipper foot on a sewing machine place the fabric
right side up and stitch the zipper in place to form a rectangle around the
zipper. Remove tacked threads.
6 partly open zipper. Line up the two squares right sides together.
Pin and stitch up the other three sides.
7 clip corners and turn right side out. Insert cushion.
Friday, April 25, 2014
Simple Cshion Cover with Opening

Materials
50cm of fabric if using a solid more if its patterned.
matching thread
cushion insert
Instructions
1Cut fabric, one piece for the front 42cm X 42cm. Two pieces for the back 25cm X 42cm.
2 Starting with the back pieces fold one long side under 1cm press flat, repeat and iron to create the hem. Stitch down its length. Repeat with the other back piece.


Wednesday, April 02, 2014
Basic Cushion Cover

The Square
finished project 36cm ( 14in)
Materials Needed
furnishing fabric approximately 40cm (16in)
Matching thread
cushion pad 36cm (14in) square
Instructions
1 Cut two 38cm (15in) squares. Most furnishing fabrics will indicate on the selvedge which way a pattern runs. its a good idea to cut and stitch both pieces running the same way. I placed a pin to help me remember which way is up.
2 (this step is optional) Looking at my fabric I felt it needed a pop of colour so I satin stitched the centres of some of the flowers with neon yellow embroidery thread.

4 Stitch around the perimeter 1 cm in from the edge. remove pins as you stitch. Back stitch start and finish to reinforce stitch. Zig-zag edge to prevent fraying.
To help me sew straight I keep the needle in the centre position on my machine and line up the fabric with the edge of the all-purpose foot. This does two things it gives a seam of about 1cm and a straight line.

5 Turn right side out, gently poke out corners with a chopstick. Insert pillow pad and slip stitch opening closed.
(if your pillow form has a zipper closure, open it and gently ease some stuffing into the corners for some nice corners.)
Tuesday, April 01, 2014
Card making

Thursday, March 13, 2014
The Shy Seahorse

Seahorse Pattern and Instruction
Finished project approximately 7'' tall
Materials Need:
10'' x 10'' fabric for body
5'' x 5'' felt
Black embroidery thread
Sewing thread to match fabric
Stuffing
Assemble
1.Cut out all pieces from chosen fabric using the template provided. Make sure to cut a mirror image of the body pieces.

2.Tack the back fin to one body piece. Hem the top of the pouch piece and tack it onto the belly. As shown above.
3. Pin and stitch belly piece to body from points A to B. Check seams

5. Check all seams and clip curves. Turn right side out, fill with stuffing. Close opening with ladder stitch.
6. Embroider the eyes using 3 strands of floss.
Final thoughts
The seahorse makes a perfect safe toy for little hands especially if a noise maker like a small bell is inserted into the stuffing before it is stitched closed.
Only the male seahorse has a pouch. make a pair one with a pouch and one without.
Seam allowances are included. Use a short stitch length. I used a 2mm length.

Subscribe to:
Posts (Atom)