Pages

Thursday, May 29, 2014

A peek at my work space

Working on new cushion covers for the shop. The fabric is a cotton print by 'Richloom'.
What are you working on?
 
Check out my new listings at

Friday, May 23, 2014

Simple Bolster Cushion


Bolster cushions are super easy to make. A bolster nestled by your sofas armrest adds a decorative touch and extra comfort. For more interest add piping to the seams in step 3.


Materials
20’ fabric
50” ribbon
14” square cushion insert


Instruction

1.       Cut one 13 x 19 in rectangle, cut two 3 x 19 in rectangles

2.       Zigzag 19 in side on all pieces.

3.        Pin and stitch the narrow rectangles on either side of the wider rectangles. Seam allowance is ½ in. Remove pins as you stitch.  Zig zag edges. You should now have a 19 in square.
 
4.       Open and press seams flat. Zig zag all edges.

5.       Fold the square in half right sides together with the narrow rectangles on the ends. Making sure the seams meet.


6.        Pin and stitch 1 in in from the edge to form a tube.

7.       Open and iron the seam flat

8.       To make the casing turn the edge over twice ½ in each time. Iron to keep in place and stitch around the circumference. If your machine has a removable extension piece remove it while stitching the casing. It makes it so much easier.


9.       To thread the ribbon through the casing channel pin one end of the ribbon to a safety pin and enter through one gap and slowly work the pin all around and emerge through the other gap. Repeat on the other end.  Turn cover right side out.


10.       To inset the square cushion roll it up and slowly pull the cover over the cushion. Once the cushion cover is in place pull the ribbon to gather the sides and tie a bow.
 

Thursday, May 22, 2014

Saturday, May 17, 2014

Seahorse Cushion

 
I think  seahorses are fascinating. This cushion has three resting on a lovely linen blend fabric.
This week I opened an Etsy shop. Something I had been thinking about for a long time. Please stop by and take a look. Just click on the link on the sidebar.

Seahorse Cushion with Pleated Trim

Materials

½ yard linen blend fabric
15 x 24 in printed fabric
Zipper
Cushion insert
Fusible web (wonder under)
Seahorse template

Instructions

1 Cut two  12x 16 rectangles from solid fabric, cut two  4 x 24in strips from printed fabric, cut one 7 x 10 in rectangle from printed fabric for seahorses.
2 Iron the wrong side of the seahorse fabric to the rough side of the fusible web (or follow product instructions). Trace the seahorse template onto the paper side of the fusible web 3 times and cut out.
3 To position the seahorses on the cushion front, firstly fold the cushion front into thirds along the long side. Place pins at the folds. Unfold the cushion front and place the first and last seahorse on the folds and the centre seahorse will sit between them. There will be about 3 ½ in on the top and bottom edges of the cushion front and the seahorses.
 
4 Remove backing paper and iron seahorses onto the cushion front. Top stitch the outline of each sea horse.

5 Fold the strips in half wrong sides together on the short side and iron to keep the fold. Open and fold the other way so right sides are together and stitch the shorts sides. Turn right side out.
 
6 Measure 1 in intervals along the raw edge. Fold starting from the right hand side the second to last mark to meet the last mark. Pin to hold in place. Repeat until you get to the end. In the photo the pink pin will fold to meet the red pin.


When pleated the strip should measure about 11 ½ in. Machine stitch to hold the pleats. Remove pins as you stitch.
 7 Attach pleats to short sides of the cushion front. Place pleats about ½ in from the edges on the top and bottom. Pin and stitch. Remove pins as you stitch.
8 Align the front and back pieces together right sides facing. Measure the zipper length a long the bottom long side and stitch the seam either side of the zipper. Make the seam allowance about ¾ of an inch. Make sure the pleats are not caught in the seam. It’s a good idea to zigzag the edges of the sipper seam at this stage.
 
9 Working from the wrong side of the cushion pieces iron the seam flat. Place the right side of the zipper face down in the middle of the seam. Tack and stitch one side of the zipper to one seam allowance only using the zipper foot. Start at the bottom end and stitch towards the top when you are about 2 ins from the top leave the needle in the fabric, lift the zipper foot and pull the zipper open until the zipper tab is behind the zipper foot release the foot and continue to stitch.
10 Turn the cushion over to the right side. Tack and top stitch the other side of the zipper in place starting at the bottom and working up and again opening the zipper as you get to the top.

11 Partly open the zipper. Align the edges of the front and back pieces right sides together with the pleats sandwiched between the front and back. Stitch around the edges of the three remaining sides to finish the cushion
12 Zigzag edges. Turn right side out and insert cushion.
 

Friday, May 09, 2014

Gathered Cushion Cover


Finished size 31x33cm

Materials
90cm cotton fabric
Matching thread
Cushion insert 36x36cm
160cm cord


Instructions

1 For the front cut two 13x37cm strips and one 13x72cm strip. For the back cut one 30x35 cm piece and one 17x35cm piece.

2 Zigzag down the length of the 72cm strip encasing an 80cm cord. Repeat on the other side.
 
3 To gather the fabric hold the cord in one hand and push the fabric towards the centre. When gathered it should be the same length as the other two pieces.


4 With right sides together stitch the three strips of fabric to form a rectangle, with the gathered piece in the middle.


5 Unpick the zigzag stitch and remove the cord. The easiest way is with a seam ripper.

6 On the right side of the fabric top stitch down the length of the seams. The front piece is now finished.
7 For the back pieces fold one long side ( 35cm)of each piece under 1cm press and fold under again  1 cm and hem.
8 Place the back pieces on the work surface right side up. They will overlay by about 5cms. Lay the front piece on top right side down. Pin the front and back pieces together and stitch around the rectangles perimeter. Remove pins as you stitch.
 
9 Zigzag edges to minimize fabric fraying. Turn right side out and insert cushion

Friday, May 02, 2014

Basic Cushion cover with a zip


Finished size: 41 X41cm
Fabric name: Lisette 2012

Materials
Fabric 50cm
Matching thread
Zipper 30cm (12in)
Insert 41 X 41 cm
 

Instructions

1 cut two squares 42 X 42 cm
2 zig zag all edges of both squares to minimize fraying

3 place the squares right sides together on your work table lay the zipper on one edge and mark where it starts and ends. Pin and stitch the seam using a 1 cm seam allowance. Leave the zip opening unstitched.
 
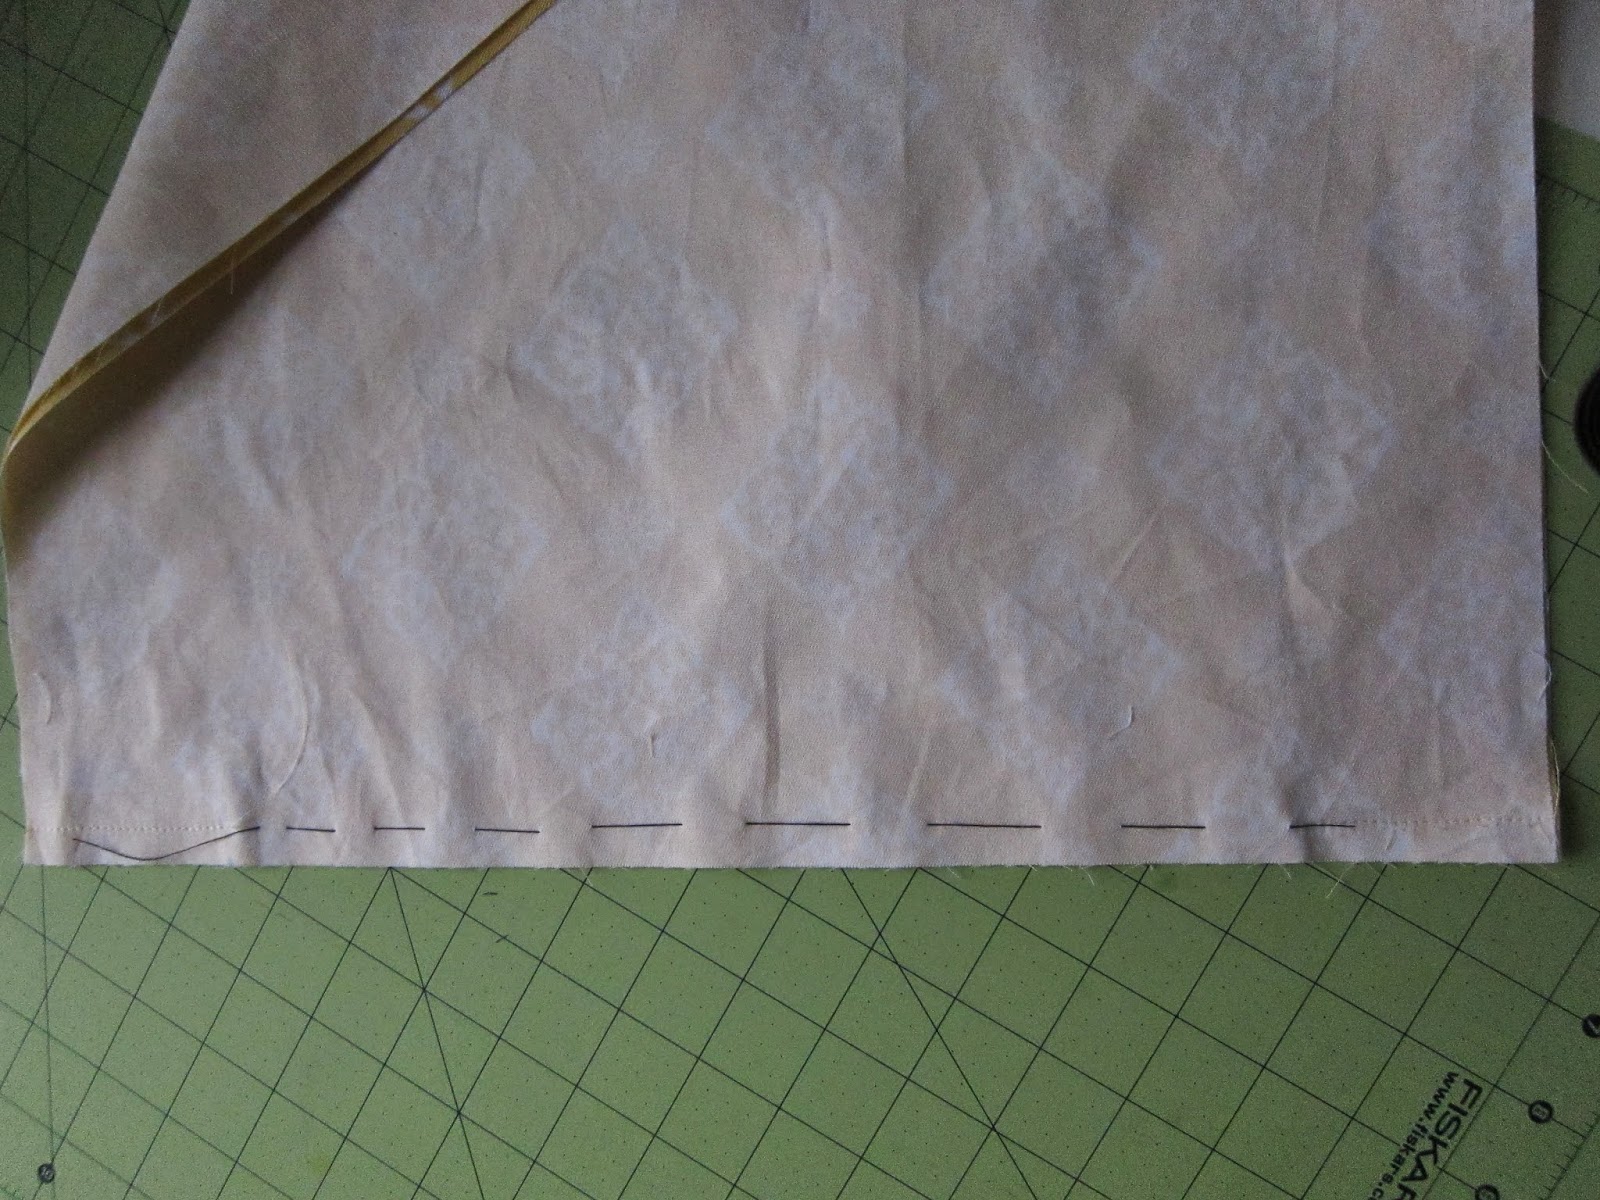
 Hand tack the zip opening closed along the seam line. Iron the seam allowance open. (Black thread was used for the photo)

4 place the zip within the tacked section of the opened seam right side down. Position the zip slightly off centre so the zip teeth sit on one seam allowance only. Pin in place and tack.


5 using the zipper foot on a sewing machine place the fabric right side up and stitch the zipper in place to form a rectangle around the zipper. Remove tacked threads.
6 partly open zipper. Line up the two squares right sides together. Pin and stitch up the other three sides.


7 clip corners and turn right side out. Insert cushion.


Friday, April 25, 2014

Simple Cshion Cover with Opening

I adore the print on this cotton fabric. Its fresh and all the butterflies remind me of warmer days. For this cushion I wanted to highlight the larger tree with the flower on the right. therefore a little  fabric was sacrificed to make this possible. This cushion cover is easy to make and it has an opening which I like because unlike the basic cushion from my last post its easy to remove for laundering.

Materials
50cm of fabric if using a solid more if its patterned.
matching thread
cushion insert

Instructions
1Cut fabric, one piece for the front 42cm X 42cm. Two pieces for the back 25cm X 42cm.
2 Starting with the back pieces fold one long side under 1cm press flat, repeat and iron to create the hem. Stitch down its length. Repeat with the other back piece.
3 Lay the  back pieces on your worktable with right sides up. overlap the two pieces to form a 42cm square. The hemmed sides should be facing the middle. The overlap will be approximately 10cm
4 Place front piece on top of overlapped back pieces  right sides together. pin together to prevent sliding during sewing. Stitch around the entire perimeter of the square. Trim corners zig zag edges to prevent fraying.
5 Turn right side out. Insert cushion

Wednesday, April 02, 2014

Basic Cushion Cover


The Square
finished project 36cm ( 14in)

Materials Needed
furnishing fabric approximately 40cm (16in)
Matching thread
cushion pad 36cm (14in) square
Instructions
1 Cut two 38cm (15in) squares. Most furnishing fabrics will indicate on the selvedge which way a pattern runs. its  a good idea to cut and stitch both pieces running the same way. I placed a pin to help me remember which way is up.
2 (this step is optional) Looking  at my fabric I felt it needed a pop of colour so I satin stitched the centres of some of the flowers with neon yellow embroidery thread.
3 Place fabric right sides together, pin to prevent slipping during sewing. Lightly mark the opening with tailor's chalk on one side about 18cm (7in) long.
4 Stitch around the perimeter 1 cm in from the edge. remove pins as you stitch. Back stitch start and finish to reinforce stitch. Zig-zag edge to prevent fraying.
To help me sew straight I keep the needle in the centre position on my machine and line up the fabric with the edge of the all-purpose foot. This does two things it gives a seam of about 1cm and a straight line.
 
 
5 Turn right side out, gently poke out corners with a chopstick. Insert pillow pad and slip stitch opening closed.
(if your pillow form has a zipper closure, open it and gently ease some stuffing into the corners for some nice corners.)


Tuesday, April 01, 2014

Card making

last week I attended a card making class at my local library. there were six of us who signed up to make eight cards ( four of each design). it took me about two hours to make all the cards. hope the library offers similar classes in the future.

Thursday, March 13, 2014

The Shy Seahorse


Seahorse Pattern and Instruction
Finished project approximately 7'' tall

Materials Need:
10'' x 10'' fabric for body
5'' x 5'' felt
Black embroidery thread
Sewing thread to match fabric
Stuffing

Assemble
1.Cut out all pieces from chosen fabric using the template provided. Make sure to cut a mirror image of the body pieces.

2.Tack the back fin to one body piece. Hem the top of the pouch piece and tack it onto the belly. As shown above.
3. Pin and stitch belly piece to body from points A to B. Check seams
4. Pin body pieces right sides together. As shown above. Starting at the opening slowing stitch all around, backstitch at the start and finish. To turn corners place the needle down into the fabric, lift the foot, spin the fabric in the desired direction, release the foot down and continue stitching.
5. Check all seams and clip curves. Turn right side out, fill with stuffing. Close opening with ladder stitch.
6. Embroider the eyes using 3 strands of floss.

Final thoughts
The seahorse makes a perfect safe toy for little hands especially if a noise maker like a small bell is inserted into the stuffing before it is stitched closed.
 Only the male seahorse has a pouch. make a pair one with a pouch and one without.
Seam allowances are included. Use a short stitch length. I used a 2mm length.

Friday, February 21, 2014

Thursday, February 13, 2014

the fairy and the goblin

my daughter is a big fan of the Rainbow Magic Fairy books, it inspired me to make for her a fairy and goblin. the goblins face was a challenge with many failed attempts before I had an ah moment just before I fell asleep one night. 

Wednesday, February 12, 2014

a coiled snake

The pattern for this project was taken from this book. The book listed it as an intermediate skill level, I was curious to learn more about the construction of the tight spiral so I had a go at it. its  not as difficult as it first appears.  the main body is a donut shape cut in half and then stitched together again. the instructions in the book are straight forward however there is no mention of clipping the curves before turning right side out which surprised me considering this project is all curves so I went ahead and clipped. the hardest part was not sewing but stuffing the snake.

Wednesday, January 22, 2014

Crossstitch Bookmark


Bookmarks could be considered outdated and redundant by many especially if they have totally embraced e-books but for me who goes back and forth between the two bookmarks are relevant and necessary.
The following project is easy and quick even for a beginner and depends on what is available in your scrap fabric basket.

Materials needed:
scrap fabric
fusible interfacing
small cross stitch* ( no larger than 5x5cm)

1. Gather fabric scraps, cut two pieces to measure 5x5cm and one to measure 4x4cm. Arrange and stitch to cross stitch top and sides. Cut another piece of fabric 13x8cm  and stitch to cross stitch bottom.
2. Cut backing fabric and interfacing 8x18cm iron on the interfacing onto the wrong side of the back piece. I used a  light weight fusible interfacing.
3. Place front and back pieces right sides together and stitch around the perimeter of the bookmark leaving a small opening for turning right side out about 2cm.

 
4. Trim corners (as shown above) and  turn right side out. To do this I use a chop stick starting at the bottom I pull the fabric over the stick until its turned right side out. Next I push out the corners using the end of a  small paintbrush.
5. Stitch around the perimeter to close the opening and create a border. Begin reading.
 
*Cross stitch image from 'Molly Makes issue 31 'Hit the Jackpot' p77.

Tuesday, January 07, 2014

making

Just over a year ago I discovered the craft magazine 'Mollie Makes'. It quickly became a favourite of mine. Each new issue is full of wonderful news and projects to try and as a bonus each issue comes with a small kit project. Until now I have just been collecting the little kits in a box, but not anymore. This past week I have been busy making a sausage dog, a sardine keyring, a felt fox brooch, a retro felt doll and a  small cross stitch rose just to name a few. Each kit has been a delight to make teaching me new ways to approach craft projects. I have one more kit left  a crochet bow. I have never crocheted before so this will be  most challenging. I am so looking forward to the next twelve issues.

Thursday, January 02, 2014

Fruit in Felt

The felt fruit were made in December. The pear and apple slice patterns came from 'Soft Toys' by Sara Gerlings. The strawberry pattern is from 'Stitched Whimsy' by Heidi Boyd and for the orange I used a simple wedge shape 6 times to create the round shape.  I also made a banana but could not find it this morning to photograph. The pattern I used for the banana is from 'Stuffed Animals' by Abby Glassenberg.
Wishing you a creative new year.

Friday, December 06, 2013

Lady Emu

Lady Emu going for a walk. Materials used felt, fake fur and fleece.

Wednesday, December 04, 2013

Decoration


We started our Christmas decorating on the weekend. There is a little bit of Christmas scattered around the house from the tree to the little Lego Santas.

Friday, November 15, 2013

Sewing Spheres


It started as an exercise in sewing a sphere using  five wedge shaped piece. It quickly evolved into this.

Wednesday, October 30, 2013